November 20, 2023 @ 16:42
DIY desert scatter terrain for Bolt Action
I recently finished this scatter terrain that I can use to play Bolt Action. I collect German DAK so this is useful for games set in Libya and surrounds.
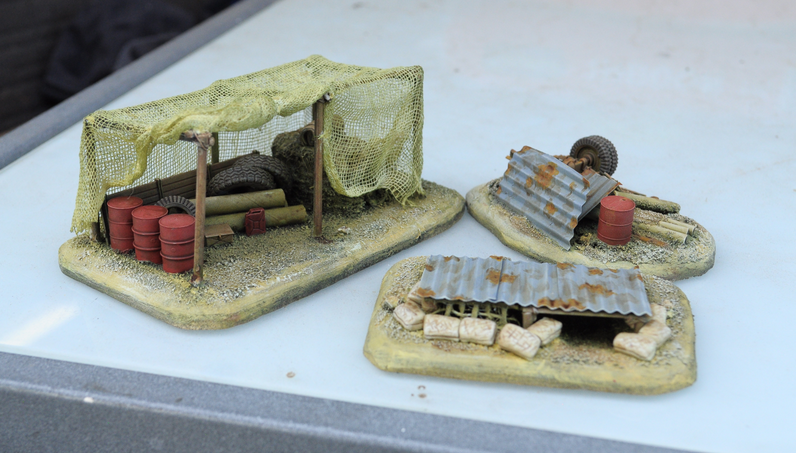
Now I'll post a pic of each and run through how I did each one.
Note that with all painting, I use underpainting as a technique, to get the highlights before the pigments go on.
For all pieces, I started by cutting out the bases at the same time with plywood. Then I rounded them down with a rotary tool.
Storage yard
I reasoned that a standing army will need many storage yards.

I did these steps in order:
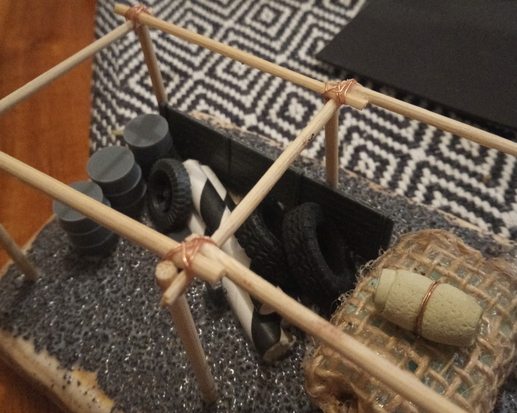
- drilled holes for the pots, which are BBQ skewers
- tied those together with copper wire and super glue
- made a bulky object to go in the back out of foam and hessian
- used a spare tarp that I made out of Milliput
- spare bits, like wheels, fuel can, from various model kits
- straws to represent pipes
- resin-printed oil drums
- used dirt/sand to make the ground texture
Here's a pic of it so far
Then:
- painted it all, using standard mini+terrain painting techniques
- used cheese cloth (single ply) to make the netting. To weigh this down, soak it in a mix of:
- water (20 parts)
- pva (1 part)
- paint (1 part)
- drape the cheese cloth over and tie bits of thread to make it look like it's tied off with rope
I made a mistake of using super glue to pin the cloth down to the wood and that looked awful so I had to paint over it, but it's mostly not noticeable
Bunker
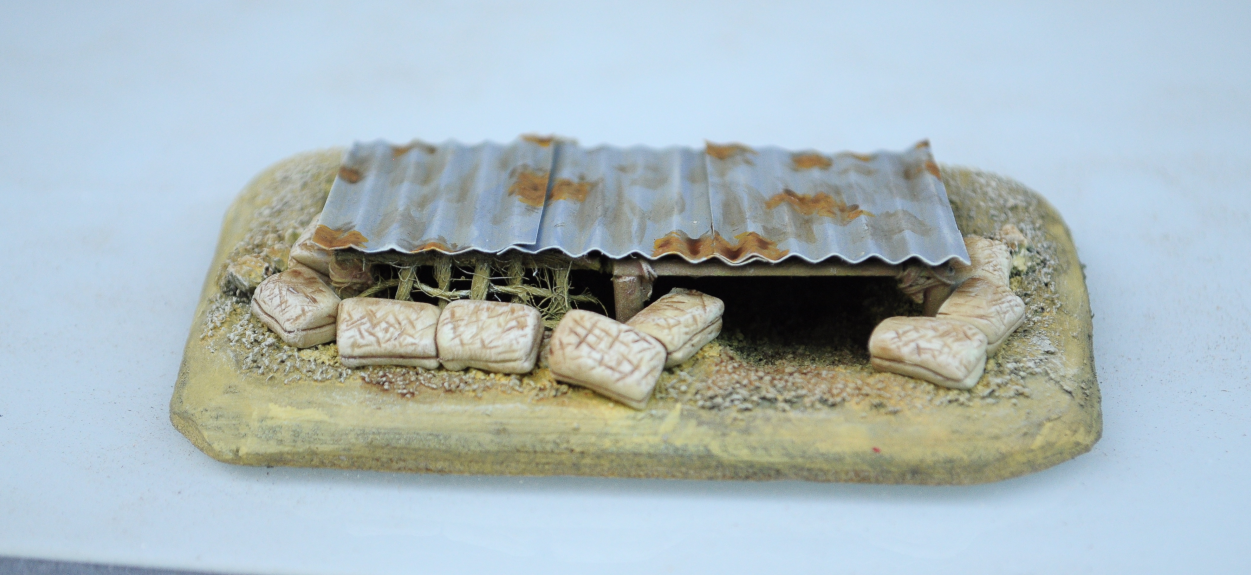
This is based on a pic I saw on the web, where a pair of soldiers were sleeping under corrugated iron.
To do this, I:
- drilled holes for the wood
- before inserting the skewers, I used a rotary tool to carve out a sunken area, so that it looks like a bunker
- insert BBQ skewers
- tied them off with copper wire
- used dirt to make the floor
- attached a piece of hessian to one side, to simulate some kind of sun protection
- primed the whole thing black before the alumimiun sheets went on, so that the inside is dark
- used a toothpaste squeezer to corrugate a spare aluminium can. I cut sheets out of the can and then pressed them through the squeezer
- glued the aluminium sheets to the bunker's roof
- primed it again with a sand primer
- painted it with standard mini+terrain painting techniques. The iron rust is a combination of red, orange, browns and then army painter washes. The corrugated iron itself is a mix of gray and blue
- it looked a bit bare so I made some sandbags out of milliput. The process to do this is on Youtube. Once I got the shape right, I pressed fly screen into the sandbags to create a fabric texture
- finally, I gave the sandbags a wash and a drybrush
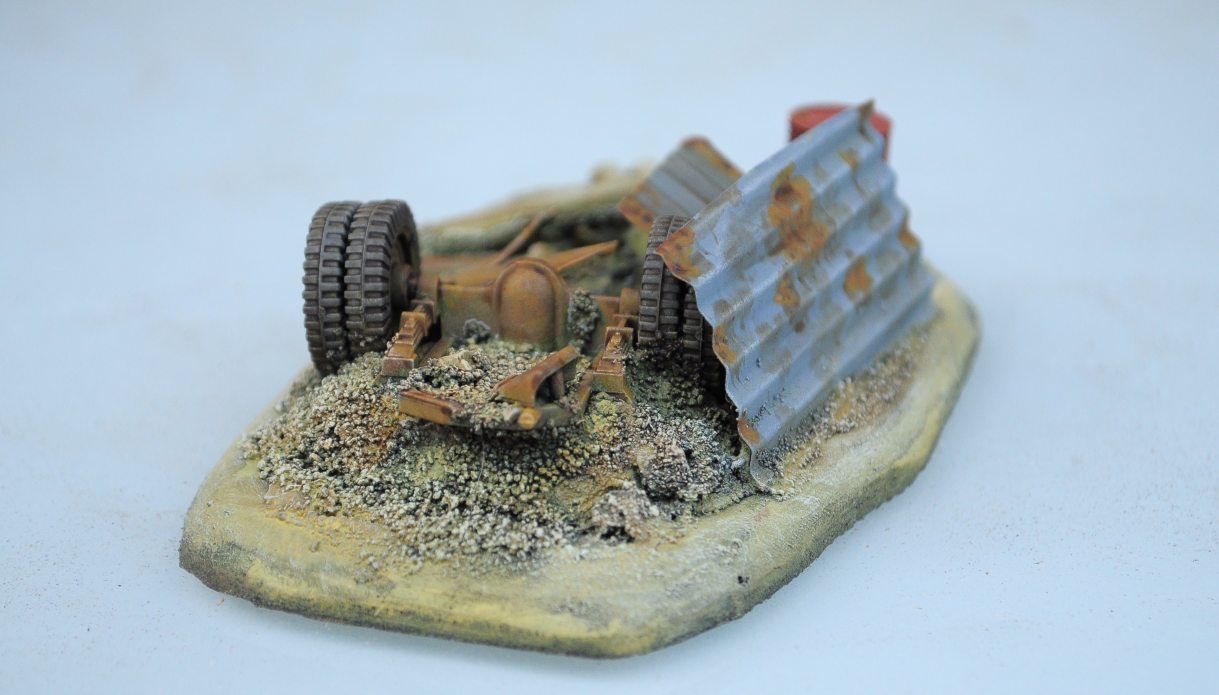
Rubbish pile
I made this one because I had a spare chassis from a model truck kit and some tires, so I thought that would make a great rubbish pile.
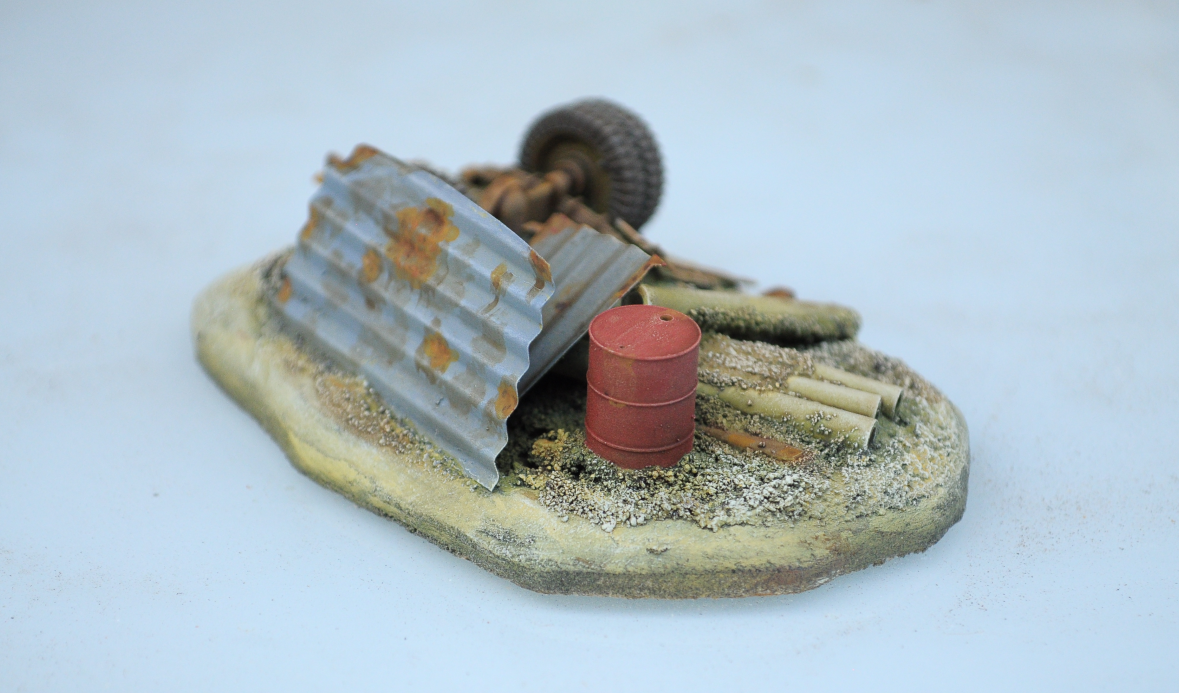
To do this, I:
- positioned the chassis on the plywood, marked its position with a pen
- mounded some polyfill up in the middle
- pressed the chassis into the mound to create a pile.
- used bits of a sprue to emulate bars of iron
- glued down some dirt to the base
- added some pipes (drinking straw), resin barrel, random bits of plastic, and some corrugated iron (aluminium) from the previous job
- used the standard mini+terrain painting techniques